Today we went a little deeper....
* To combine compositions you drag the compositions down into another empty one. You'll then see that composition as one layer. This is known as nesting.
* For working with 3D space you click on the 3D layer icon. Now the transform properties change to add a 3rd dimension.
* I can view through different angles and add different viewers. Only the active camera will do the final render and layers will only show up in a view other than the front view if their 3D is on.
* In 3D the concept of "one layer over another isn't in place anymore as they are in 3D space.
* To add a camera go to layer & select new -> camera. That then appears as a new layer. I can then keyframe the movement of the camera just like other layers' properties.
* Then select the camera, go to layer, -> transform, auto orient. This lets you choose between the camera orienting along a path, point of interest or no orientation.
* A lot of animations work can be done simply by animating the camera.
* To switch to another shot add a camera and the one on the top will be active when the cameras are overlapping. Trim the cameras' lengths so that the camera you want is giving the right angle at the right time.
* Original compositions when changed are still mirrored in nested compositions. Collapse transformations makes 3D properties viewable and in nested compositions lets you see layers outside the frame & groups the layers together.
* A useful way of saving is by using collect files option. This makes a copy of everything you're working on and puts it together.
* Adding lights is lust like working with cameras, it is possible to set lights so they cast shadows.
* Lights can be parallel, spot, ambient e.t.c & a few other settings. The light then appears in the layers.
* Then other layers acquire material options that determine how the layer reacts to light.
Expressions....
* Select a property and go to animation and add expression.
* A little field then appears.
* To link say opacity of a red solid to change opacity of another use the pig whip and click & drag the whip to another property.
* Modify Expressions; I can change things by a fixed relationship by changing the percentage on the pig whipped property.
* When working with 2 different scales one would need to do a little maths to make sure that the change of one property changes the same proportion of another. E.g 100% of opacity vs 360 degrees.
* For random movement type "wiggle(2,10)" into the expression field.
* For writing code in general alt click on the stop-watch of an attribute and hit the play button for the dictionary code terms.


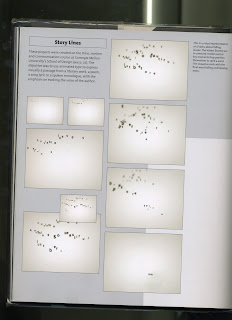
 These scanned images from the book are the ideas for the graphics that appeal to me. The posts following on are of font ideas and text arrangement ideas.


 The images containing small black letters floating on a cloudy background I particularly like as it has rather relaxed dreamy qualities, yet at the same time it remains a little academic and serious.