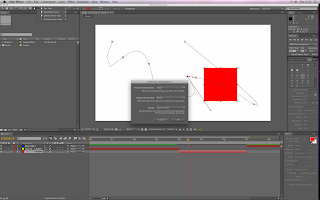
 I've been looking forward to properly sinking my teeth into after effects for quite some time and although I'd used it for very specific jobs before, I had never really known enough for it to be of any real use. So I think I give a very detailed description on how to use it so that it all gets embedded deeply in my head.
 The whole program is like photoshop for video and it uses a timeline just like Final Cut, which is also the layers palette, just like Photoshop.
* The active panel is the highlighted one, some features are only accessible when active.
To start off....
* New composition and select new preset, new solid layer and then I selected a square as it's a still image and it automatically lasts for the duration of the composition.
* Every asset in the composition must have its own layer.
* To view your work you should always hit ram preview so that it renders things temporarily in RAM as it guarantees real time playback.
* To generate a quicker ram preview change the quality settings on the bottom of the display window.
* I can also set a work area (the only area that will be played) by moving markers on the timeline.
* If I click the transform properties arrow on a layer I can play with the transform properties of an asset.
* The Anchor point is; the center of rotation, center of scaling and by default in the centre.
* To enable keyframing, click the stopwatch.
* The arrows either side of the keyframe button can shift between keyframes, clicking the button adds a keyframe.
* I can select all the keyframes and move them at will and make the whole sequence take more or less time by moving all the keyframes and keeping the ratio the same by using the alt key.
* I can keyframe multiple layers by selecting multiple layers and manipulating the keyframes just as previously.
* P on the keyboard displays position properties on a layer. R does rotation, A does anchor point, S does scale, A anchor point, S does scale and T does opacity.
* O takes you to the last frame of the layer and I for the first frame.
* B and N set the beginning and end of the work area. U shows all properties you have animated.
* I can play with what happens between the keyframes by playing with the handles using the pen tool.
* Using keyframe interpolation I can change the properties of the handles.
* To ease in and out I use keyframe assistant or the graph editor. With assistant I select a keyframe, go to animation and select an option from keyframe assistant. Using the graph editor I can view the speed between keyframes and change them accordingly.
* Layer switches: shy hides layers in the timeline when shy in enabled. Visibility on far left, hides/shows layers in viewer. Quality changes the resolution for faster or slower ram previews.
* FX lets you turn FX on or off, Frame lets you when working with slowed down video to blend for some more realism.
* Adjustment layers let you apply an effect to multiple layers. To do this: new solid layer, make it the size of the composition, turn on adjustment, apply effects, everything beneath the layer is affected.
* Toggle switches modes at the bottom and toggles to a different set of options.
* Mode determines how layers are blended and combined with ones beneath.
* Track mat -> change it on a layer that I want masked by another layer on top.
* Parent lets you group layers together so that any spacial attributes of the parent affect the child. The child can move independently.
* To use images import your images as a photoshop or illustrator file. On photoshop you must have your background transparent. Checking the quality switch continuously rastorises the illustrator file & restores its vector quality across the timeline.
WITH PHOTOSHOP
* Go to new, presets, film & video, and make sure they are corresponding settings to After Effects.
* When you import photoshop files you should import them as a composition and then a new composition appears on the timeline.
* To create hold keyframes (keyframes that stay the same until another keyframe comes along) simply select a keyframe and then go to keyframe interpolation & select the hold key option.
* Keyframe animation using position scale rotation and opacity.

No comments:
Post a Comment